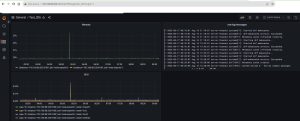
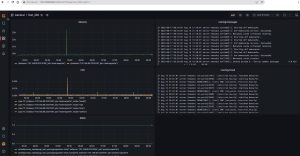
Thiết Lập Và Monitoring Hệ Thống Với Prometheus/Loki/Grafana (Phần 2)
Ở Phần 1, chúng ta đã biết những nguy cơ và tác động có thể xảy ra nếu doanh nghiệp không triển khai hệ thống giám sát hoặc giám sát không có hiệu quả. Đồng thời, chúng ta cũng đã biết cách thiết lập server cần theo dõi cho một hệ thống. Phần 2 này sẽ tiếp tục chỉ cho mọi người cách thiết lập server monitor như thế nào để hoàn thiện một hệ thống giám sát nhé.
Triển khai mô hình giám sát hệ thống (tt)
2. Thiết lập server monitor
Những thứ cần thiết lập : Prometheus , Loki và Grafana
Các bước download và cài đặt
# Tạo folder chứa prometheus
$ mkdir /usr/local/src/prometheus
# Di chuyển đến folder vừa tạo
$ cd /usr/local/src/prometheus
# Download Prometheus mới nhất
$ wget https://github.com/prometheus/prometheus/releases/download/v2.46.0/prometheus-2.46.0.linux-amd64.tar.gz
# Giải nén file vừa download
$ tar zxvf prometheus-2.46.0.linux-amd64.tar.gz
$ mv prometheus-2.46.0.linux-amd64 prometheus
#Lưu trữ vào /usr/bin
$ cp -r prometheus/prometheus /usr/bin
Download file cấu hình và setting lại phù hợp với yêu cầu
#Tạo folder config và download config file
$ mkdir /etc/prometheus
$ cd /etc/prometheus
$ wget https://raw.githubusercontent.com/prometheus/prometheus/master/documentation/examples/prometheus.yml
Setting file config cho phù hợp với như trong bài hướng dẫn này
# my global config
global:
  scrape_interval: 15s # Set the scrape interval to every 15 seconds. Default is every 1 minute.
  evaluation_interval: 15s # Evaluate rules every 15 seconds. The default is every 1 minute.
  # scrape_timeout is set to the global default (10s).

# Alertmanager configuration
alerting:
  alertmanagers:
    - static_configs:
        - targets:
          # - alertmanager:9093

# Load rules once and periodically evaluate them according to the global 'evaluation_interval'.
rule_files:
  # - "first_rules.yml"
  # - "second_rules.yml"

# A scrape configuration containing exactly one endpoint to scrape:
# Here it's Prometheus itself.
scrape_configs:
  # The job name is added as a label `job=<job_name>` to any timeseries scraped from this config.
  - job_name: "prometheus"

    # metrics_path defaults to '/metrics'
    # scheme defaults to 'http'.

    static_configs:
      - targets: ["192.168.88.206:9090"]
  - job_name: 'node-exporter'
    static_configs:
      - targets: ["192.168.88.233:9100"]
  - job_name: 'process-exporter'
    static_configs:
      - targets: ["192.168.88.233:9256"]
Tạo file service để khởi động
$ vi /usr/lib/systemd/system/prometheus-node-exporter.service
Cập nhật nội dung như sau
[Unit]
Description=Prometheus - Monitoring system and time series database
Documentation=https://prometheus.io/docs/introduction/overview/
After=network-online.target

[Service]
Type=simple
ExecStart=/usr/bin/prometheus \
  --config.file=/etc/prometheus/prometheus.yml \

[Install]
WantedBy=multi-user.target
Khởi động và xác nhận tình trạng service đã cài đặt hoàn thành chưa
# Reload daemon
$ systemctl daemon-reload$ systemctl enable prometheus.service$ systemctl start prometheus.service
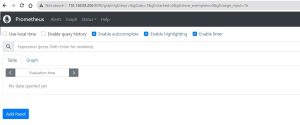
Xác nhận tình trạng bằng browser theo URL:
http://192.168.88.206:9090
Các bước download và cài đặt
# Tạo folder chứa loki
$ mkdir /usr/local/src/loki
# Di chuyển đến folder vừa tạo
$ cd /usr/local/src/loki
# Download Version mới nhất
$ curl -O -L "https://github.com/grafana/loki/releases/download/v2.8.4/loki-linux-amd64.zip"
# Giải nén
$ unzip "loki-linux-amd64.zip"
# Cấp quyền thực thi cho loki
$ chmod a+x "loki-linux-amd64"
# Copy đến /usr/bin
$ cp -r loki-linux-amd64 /usr/bin
Download file cấu hình
# Tạo folder lưu config file loki
$ mkdir /etc/loki
# Di chuyển đến folder vừa tạo
$ cd /etc/loki
# Download config file
$ wget https://raw.githubusercontent.com/grafana/loki/main/cmd/loki/loki-local-config.yaml
Tạo Service file để khởi động
$ vi /usr/lib/systemd/system/loki.service
Nội dung file service như sau
[Unit]
Description=Loki
Documentation=https://github.com/grafana/loki/releases/

[Service]
Type=simple
ExecStart=/usr/bin/loki-linux-amd64 \
  -config.file=/etc/loki/loki-local-config.yaml

[Install]
WantedBy=multi-user.target
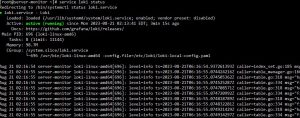
Khởi động và xác nhận tình trạng dịch vụ
$ service loki status
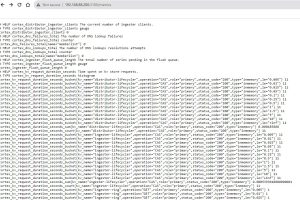
Kiểm tra bằng browser tại url:
http://192.168.88.206:3100/metrics
Kiểm tra thử bằng process
$ ps -ax | grep loki
Kết quả

Sử dụng hệ điều hành centOS8 nên cần tạo repo dùng để install Grafana
$ vi /etc/yum.repos.d/grafana.repo
Nội dung
# Thêm repo cho Grafana
[grafana]
name=grafana
baseurl=https://packages.grafana.com/oss/rpm
repo_gpgcheck=1
enabled=1
gpgcheck=1
gpgkey=https://packages.grafana.com/gpg.key
sslverify=1
sslcacert=/etc/pki/tls/certs/ca-bundle.crt
Install Grafana và start
# Install Grafana
$ yum install grafana -y
# Start lên thôi nào
$ systemctl start grafana-server
Dùng browser để kiểm tra xem nào:
http://192.168.88.206:3100
( Default: username: admin, password: admin)

Setup cơ bản
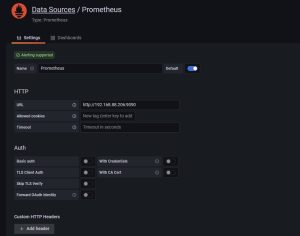
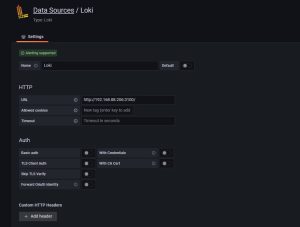
Thêm datasource cho Prometheus và Loki
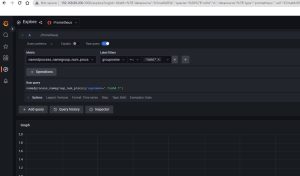
CPU
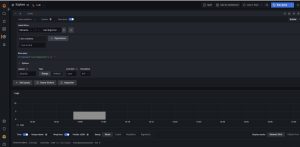
- Menu → Explore
- Data source:Prometheus
- Metric: node_cpu_seconds_total
- Label filters: mode !~ idle
- Rate: Range 1m
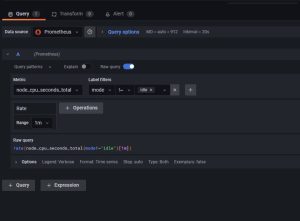
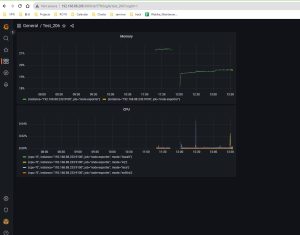
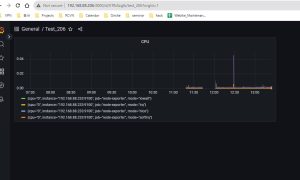
Chúng ta add to Dashboard để dễ monitor nhé
Memory
- Menu → Explore
- Data source:Prometheus
- Lựa chọn mode bên phải là : code
- Nhập code vào ô Metrics browser > :

- Chúng ta xem qua kết quả nào

Sshd Process
- Menu → Explore
- Data source:Prometheus
- Metric: nodeprocess_namegroup_num_procs
- Label filters: groupname =~ .*sshd.*

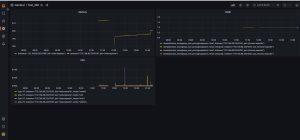
- Kiểm tra kết quả trên Dashboard thôi nào

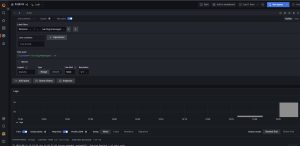
Log của hệ thống /var/log/messages
- Data:Loki
- Label filters: filename = /var/log/messages

- Xem kết quả nào

Log của cron /var/log/crond
- Data: Loki
- Label filters: filename = /var/log/crond

- Xem kết quả nào

Tổng kết
Nhìn chung, bất kỳ hệ thống nào cũng cần phải có một hệ thống giám sát. Việc lựa chọn công cụ hỗ trợ trong số nhiều công cụ ngoài kia cần phải trải qua sự thử nghiệm thực tế, cũng như xem xét xem độ phù hợp với hệ thống của chúng ta.
Hoạt động của Grafana rất trực quan và dễ dàng theo dõi kiểm soát mà không cần phải tốn nhiều công để nghiên cứu. Sau lần đầu tiên thử xây dựng cơ sở hạ tầng giám sát, bản thân đã rút ra được nhiều bài học, từ đó có thể tổng kết chút kinh nghiệm thành một bài chia sẻ để mọi người cùng tham khảo.
Cảm ơn mọi người đã quan tâm theo dõi bài viết!
 | Phan Văn Liền Web Developer |


